This week we want to talk connectivity, so that students wearing hearing aids are able to fully participate in eLearning using their hearing aids as headphones.
Using hearing aids to listen to eLearning or other audio amplifies the sound specific to the users unique hearing loss and greatly improves student access. Hear Indiana Audiologist, Dr.Lauren Gowdy, has shared below some of the ways to a few of our most popular pediatric hearing aids with Bluetooth enabled devices.
Almost all hearing aids and cochlear implants are able to connect to a Bluetooth device either directly or with a hearing aid accessory. If the student’s device is not listed below, contact your managing audiologist for options specific to your devices.
Click below to jump to the section related to your device:
Oticon Hearing Aids
Sensei, Ria, Alta, Nera, Dynamo
Phonak Hearing Aids
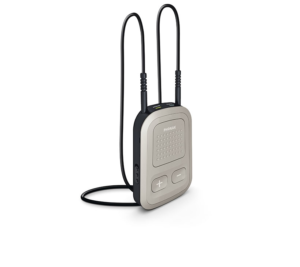
Using your ComPilot II or ComPilot Air II
Streaming with an FM/DM System
How do you know what type of hearing aids you have?
For Oticon hearing aids, the name of the hearing aid should be somewhere along the spine of the hearing aid (opposite side of any buttons or volume controls).
Phonak hearing aids indicate their platform with a letter before the numbers in the name of the hearing aid. For example, a Phonak Sky Marvel 70 level Power Rechargeable hearing aid would be “Phonak Sky M70 PR” or a Phonak Sky Belong 70 level super power hearing aid would be “Phonak Sky B70 SP”. The name will be on the spine of the hearing aid (opposite side of any buttons or volume control).
Things to Keep in Mind:
- Make sure your accessories are fully charged each day to ensure a full day of streaming when eLearning.
- Hearing aid batteries will drain more quickly while streaming due to the amount of power needed to maintain connectivity.
- If you are using an accessory (ConnectClip, Streamer Pro, ComPilot) to connect to a computer and need to use a microphone for meetings, you will need to make sure the accessory is close to your face or around your neck and the microphone is unobstructed by clothing and hair. You also want to make sure the accessory is not touching any jewelry while using the microphone.
If you have any issues with connectivity or getting in touch with your audiologist, the manufacturers are able to troubleshoot any issue with you. Don’t wait, please call the manufacturer of your hearing aids to get assistance!
Oticon Patient Care Hotline: 1-800-526-3921 option 6
Phonak Patient Care Hotline: 1-800-679-4871 or you can use the consumer website.
Oticon Hearing Aids
Oticon Opn/Xceed Hearing Aids
You will need a ConnectClip to connect your Oticon Opn hearing aids to your computer. The Oticon Opn hearing aids are “Made for iPhone” (MFi) which means they will only directly stream music from an iPhone, iPad, or iPod. If you don’t have a ConnectClip for your Opn/Xceed hearing aids, be sure to contact your audiologist for purchasing options.
ConnectClip
How to pair your ConnectClip with your hearing aids and laptop: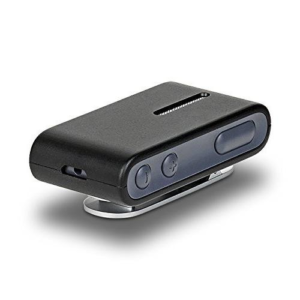
- Turn your Oticon Opn hearing aids on (by open and closing battery door) – Note: hearing aids remain in pairing mode for the first 3 minutes they are powered on
- Pair hearing aids to the ConnectClip (make sure ConnectClip has been charged)
- Press down on the multi-button (long button) for about 10 seconds and one LED will turn solid green while the other will blink yellow.
- Hold ConnectClip next to both hearing aids while the second LED is blinking yellow.
- Once paired, the yellow LED will stop blinking – this may take a while, so please be patient!
Pairing your ConnectClip to your computer:
- Click the Bluetooth icon on your computer or go into the Bluetooth settings
- Make sure Bluetooth is set to “on”
- Hold the multi-button and the “+” button on the ConnectClip at the same time until the LED light blinks blue (will stay in pairing mode for 3 minutes).
- Once the ConnectClip is in pairing mode and blinking blue, the ConnectClip should appear in the devices options of the Bluetooth settings on your computer
- Click “pair” next to the “ConnectClip” in the computer settings.
- Once paired to device, the ConnectClip LED will be solid blue
- When streaming anything from your Bluetooth device such as your computer, the LED light will turn from orange to blue on the ConnectClip.
You only have to go through this process one time and you can pair the ConnectClip with eight different devices. When you want to switch devices, in the Bluetooth settings select “disconnect” next to the hearing aid on the previous device and select “connect” on the other device you want to pair. ConnectClip will show preference to the first paired device. See Oticon ConnectClip FAQ for more troubleshooting.
If you are in a virtual meeting or need to use the microphone, you will use the microphone on the ConnectClip, so make sure it is about 6 inches from your mouth and not under any fabric, such as a scarf, or touching any jewelry.
Pro tip: If you’re having difficulty pairing, try clearing your previous pairings by holding the multi-button and the volume “up” and “down” buttons at the same time for 10 seconds.
Bluetooth Dongle (BTD)
If your computer doesn’t have Bluetooth capabilities, the connection is not consistent, or you are already using your Bluetooth for something else, you could consider a Bluetooth Dongle (BTD) 800 from Oticon to connect via USB connection through your ConnectClip; talk to your audiologist about how to get the BTD.
To connect your BTD to your hearing aids, follow the steps above, but instead of doing the first 3 steps of putting your computer in “search” or “pairing mode”, you will need to hold down the end of the BTD until it blinks blue and red to put it in pairing mode. Both the ConnectClip and BTD will have a solid blue light when paired.
The ConnectClip, unfortunately, does not have an auxiliary (Aux) port to directly connect without Bluetooth.
Pro tip: If the hearing aid user is hearing too much background noise from the hearing aid microphones (i.e., family members talking, television, dog barking) while trying to complete eLearning, the hearing aid microphones can be muted to decrease the amount of background noise being heard.
To do this:
- Hold down on the volume down ( – ) button on the ConnectClip.
- If indicator lights are activated on these hearing aids, then the indicator lights will repeatedly blink green and red to let the parent know the hearing aid is muted.
- Press any volume button on the ConnectClip to un-mute the hearing aids.
Looking for more info? The Oticon links below (intended for connecting to your cell phone) will be the best additional resource when trying to connect to a computer or other Bluetooth enabled device, because they follow the same steps.
Oticon – How to Connect to Wireless Accessories
Oticon – ConnectClip Quick Start Guide
Sensei, Ria, Alta, Nera, Dynamo Hearing Aids
Oticon Streamer Pro:
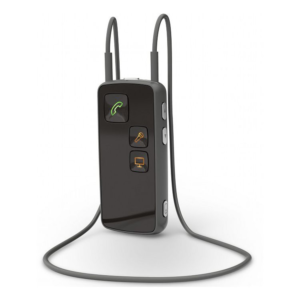 If you don’t have the newest Oticon Opn/Xceed hearing aids that have Bluetooth connectivity, then you may need an Oticon Streamer Pro. The Oticon Streamer Pro will first need to be paired with your hearing aids at your audiologist’s office. After that, follow the steps below:
Oticon Streamer Pro needs to be worn around the neck with the neck loop, or within 3 feet of hearing aids, in order to connect to the hearing aids; neck loop is preferred for consistent streaming.
Steps to pairing your Streamer Pro with your computer (if Bluetooth is available):
- Click the Bluetooth icon on your computer or go into the Bluetooth settings.
- Click/right click on Bluetooth to open your Bluetooth settings.
- Make sure the Bluetooth is set to “on”.
- Turn Streamer Pro on by holding the power button for 2 seconds – it should have a solid green LED light. If there is a solid or blinking red light, you need to charge your Streamer Pro.
- Hold the power button for 5 seconds or until there is a blinking blue LED light to put Streamer Pro into pairing mode.
- Once the Streamer Pro is in pairing mode and blinking blue, it should appear as an option under devices in your computer’s Bluetooth settings.
- Click “pair” next to “Streamer Pro” in the computer settings. The pin code for the Streamer Pro is “0000” (four zeros), if requested.
- Once paired, the Streamer Pro LED light will be solid blue.
- When streaming, the Streamer Pro LED light will be solid blue.
You only have to go through this process one time and you can pair the Streamer Pro with eight different devices. When you want to switch devices, in the Bluetooth settings select “disconnect” next to the hearing aid on the previous device and select “connect” on the other device you want to connect.
If you are in a virtual meeting or need to use the microphone, you will use the microphone on the Streamer Pro, so make sure it is in front and around your neck, not under any fabric, such as a scarf, or touching any hair or jewelry.
Pro tip: If you’re having difficulty pairing, try clearing your previous pairings by holding the power button and the volume “up” button at the same time for 3 seconds – then restart your Streamer Pro.
If you don’t have the ability to connect via Bluetooth with the Streamer Pro due to limitations of the computer, or using an audio device that doesn’t have Bluetooth capabilities, you can use an auxiliary (Aux) cord to connect the computer to the Streamer Pro directly. An Aux cord should have come with the Streamer Pro but if you can’t find it, one like this will work great: Aux Cord from Target
You can also use a Bluetooth Dongle (BTD) from Oticon to connect to a Streamer Pro using a USB connection. Talk with your managing audiologist for help with this.
Pro tip: If the hearing aid user is hearing too much background noise from the hearing aid microphones (i.e., family members talking, television, dog barking) while trying to complete eLearning, the hearing aid microphones can be muted to decrease the amount of background noise being heard.
To do this:
- Hold down on the volume down ( – ) button on the Streamer Pro.
- Press any volume button on the Streamer Pro to un-mute the hearing aids. To do this, all you need to do is hold down on the volume down ( – ) and volume up ( + ) button at the same time on the Streamer Pro. Press any volume button on the Streamer Pro to un-mute the hearing aids.
If you need further instructions, please refer to the links below. (Follow instructions for connecting to a cell phone, in order to connect to a computer or other Bluetooth capable device):
Oticon ConnectLine Streamer Pro Getting Starter Guide
Oticon StreamerPro Instructions for Use
Additional Connectivity Option:
Streamer Pro out of the budget? Audio devices like eLearning computers lack Bluetooth capabilities? Then it’s time to consider a Direct-Audio-Input (DAI) cord.
A DAI cord will only work with hearing aids that are compatible with ear-level FM/DM receivers (i.e., Opn Play BTE, Opn Xceed, Sensei, Safari). This option is fairly inexpensive compared to wireless accessories. You will need an audioshoe for each hearing aid and one DAI cord. All supplies should be available to purchase through your audiologist from Oticon and are usually less expensive than other wireless accessory options.
Phonak Hearing Aids
We’re going to discuss Phonak’s Marvel, Venture, and Belong devices along with some of their associated accessories. If you need help determining which device platform you have, click here.
Marvel Hearing Aids
Marvel hearing aids will connect to Bluetooth enabled devices like newer speakers and newer vehicles, in addition to connecting to your computer or phone.
How to connect to your computer or other Bluetooth enabled device:
- Click the Bluetooth icon on your computer or go into the Bluetooth settings.
- Make sure the Bluetooth is set to “on.” You may need to click on “add Bluetooth or other device” to put the computer into pairing mode.
- Restart your hearing aids by powering them off (opening the battery door), wait 5 seconds, and power the hearing aids back on (closing the battery door).
If the hearing aids are rechargeable, hold down on the volume down toggle of the hearing aids to power off (red indicator light), wait 5 seconds, then power on (green indicator light). Hearing aids will stay in pairing mode for three minutes.
- Once the hearing aids are in pairing mode (recently powered on), hearing aids will appear as a Bluetooth device option usually as “R-Phonak hearing aid”.
- Click “pair” next to the hearing aid in the computer settings.
- Once paired, the hearing aid will play a tone, and the audio should stream to your hearing aids.
You only have to go through this process one time and you can pair these hearing aids to two different devices – like a computer and your mobile device. When you want to switch devices, in the Bluetooth settings select “disconnect” next to the hearing aid on the previous device and select “connect” on the second/new device you want to connect.
With the Marvel hearing aids, you do not need a secondary microphone. They use the hearing aid microphone for communication while connected to Bluetooth.
Venture and Belong Phonak Hearing Aids
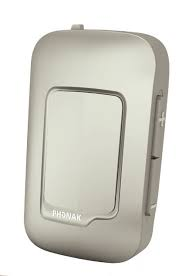
For Venture and Belong Platforms you will need to use an intermediary device called the Phonak ComPilot II or Phonak ComPilot Air II.
The ComPilot will allow you to connect to any Bluetooth device. In order to use the ComPilot, it will first need to be configured by your audiologist.
Note: You do not need to be seen in the office for ComPilot configuration but the ComPilot will first need to be programmed at the audiology office.
Let’s look at the differences between ComPilot II and ComPilot Air II:
- ComPilot II needs to be worn around the neck, with the neckloop, in order to connect to the hearing aids. The ComPilot Air II will only need to be worn near the hearing aids and has a clip on the backside. The ComPilot Air II may be worn near the waist, but if connectivity is not stable, then you should try moving it closer to the hearing aids, possibly wearing it around the neck.
- ComPilot Air II does not have an Aux input port like the ComPilot II, so it’s only able to stream audio from Bluetooth capable devices.
- Unfortunately, the ComPilot Air II does not have a Europlug, which would allow for direct audio input (DAI) to connect to an FM/DM system.
To Connect the ComPilot Air II to your computer:
- Open your Bluetooth settings on your computer. You can usually search for Bluetooth settings in your search engine or click on the Bluetooth icon (next to the clock on your computer) and select Bluetooth settings or Bluetooth preferences.
- Make sure the Bluetooth is “on” and put the computer into search mode, or select an “Add device” option.
- Make sure ComPilot Air II is powered off.
- Put ComPilot Air II into pairing mode by holding the ( + ) button first then powering on ComPilot Air II while holding the ( + ) button until the indicator light is rapidly blinking blue.
- Once the ComPilot Air II is in pairing mode and rapidly blinking blue, the ComPilot Air II will appear in the device’s options of the Bluetooth settings on your computer.
- Click “pair” next to the “ComPilot Air II” in the computer settings. Enter the code “0000” if prompted.
- Once paired to the computer, the ComPilot II LED will be slowly blinking blue.
- When streaming anything from your Bluetooth device, like from your computer, the LED light will turn from slow blinking blue to a solid blue.
You only have to go through this process one time. You can pair the ComPilot Air II with 8 different devices but only two different cell phones. When you want to switch devices, in the Bluetooth settings select “disconnect” next to the hearing aid on the previous device, and select “connect” on the other device you want to connect.
If you are in a virtual meeting or need to use the microphone, you will use the microphone on the ComPilot Air II. Make sure it is about 6 inches from your mouth and not under any fabric, such as a scarf, hair, or touching any jewelry.
You can also use a Bluetooth Dongle (BTD) from Phonak to connect a computer to the ComPilot Air II using a USB connection. Talk with your audiologist for help with ordering this.
Phonak ComPilot Air II User Guide
To Connect the ComPilot II to your computer:
- Open your Bluetooth settings on your computer. You can usually search for Bluetooth settings in your search engine or clicking on the Bluetooth icon (next to the clock on your computer) and select Bluetooth settings or Bluetooth preferences.
- Make sure the Bluetooth is “on” and put the computer into search mode or select an “add device” option.
- Hold the volume up ( + ) button and the connect ( <> ) button on the ComPilot II at the same time until the LED light blinks blue (will stay in pairing mode for 1 minute).
- Once the ComPilot II is in pairing mode and rapidly blinking blue, the ComPilot II should appear in the devices options of the Bluetooth settings on your computer.
- Click “pair” next to “ComPilot II” in the computer settings. Enter the code “0000” if prompted.
- Once paired to the computer, the ComPilot II LED will slowly blink blue.
- When streaming anything from your Bluetooth device, like your computer, the LED light will turn from slow blinking blue to solid blue.
You only have to go through this process one time. You can pair the ComPilot Air II with eight different devices but only two different cell phones. When you want to switch devices, in the Bluetooth settings select “disconnect” next to the hearing aid on the previous device, and select “connect” on the other device you want to connect.
If you are in a virtual meeting or need to use the microphone, you will use the microphone on the ComPilot II, so make sure it is about 6 inches from your mouth and not under any fabric, such as a scarf, hair, or touching any jewelry.
Some computers and audio devices have limitations in connecting the ComPilot II via Bluetooth, or lack the ability to connect to Bluetooth entirely. In that case, you can use an Aux cord to connect the computer to the ComPilot II directly. An Aux cord should have come with your ComPilot II, but if you’ve lost it, one like this will work great: Aux Cord from Target
You can also use a Bluetooth Dongle (BTD) from Phonak to connect a computer to the ComPilot II using a USB connection. Talk with your audiologist, they can help you get one ordered.
Still having trouble? Check out the Phonak ComPilot II User Guide for more detailed instructions.
Streaming with your FM/DM System:
If you don’t have a hearing aid accessory for your hearing aids such as a Streamer Pro or ComPilot II, then you can also stream audio with your FM/DM system! Each FM/DM System Transmitter will have an Aux input port. Once connected with the hearing aids, the Aux cord can be plugged into the computer or audio device, and the other end of the Aux cord will plug into the FM/DM System Transmitter. If you don’t have an Aux cord, this one will work great: Aux Cord from Target
Hear Indiana has an Assistive Technology Loaner Bank to allow families to trial an FM/DM system for up to 6 weeks at no charge. To learn more or inquire about a loaner system, click here.
“We believe that connecting everyone in the world is one of the great challenges of our generation, and that’s why we are happy to play whatever small part in it that we can.”
– Mark Zuckerberg